Introduction
Installing a SHUG removable bollard is an excellent solution for enhancing security and managing access on Australian properties. These bollards offer the perfect blend of robustness and flexibility, making them ideal for various settings, from residential driveways to commercial car parks. In this guide, we’ll explore the benefits of SHUG removable bollards and provide a detailed, step-by-step installation process to ensure optimal performance and security.
Benefits of SHUG Removable Bollards
Enhanced Security
SHUG removable bollards provide a strong physical barrier, deterring unauthorised access and protecting your property from potential intrusions and vehicle-related damages.
Flexibility and Convenience
Unlike permanent bollards, SHUG removable bollards can be easily removed and reinstalled as needed. This flexibility is ideal for areas that require occasional access, such as driveways, loading docks, and event spaces.
Durable Construction
Made from high-quality materials, SHUG bollards are designed to withstand harsh Australian weather conditions and significant physical impact, ensuring long-lasting protection for your property.
Step-by-Step Installation Process
Step 1: Gather the Required Tools and Materials
Before you start, ensure you have all the necessary tools and materials. You’ll need:
- Core Drill
- Measuring tape
- Marking chalk or spray paint
- Shovel or post-hole digger
- Concrete mix
- Spirit level
- Epoxy Resin
Step 2: Select the Installation Site
Choose a suitable location for your bollard. Ensure the site is clear of underground utilities and allows sufficient space for the bollard to be removed and reinstalled without obstruction.
Step 3: Mark the Installation Spot
Use marking chalk or spray paint to mark the exact spot where the bollard will be installed. Ensure the marking is accurate to avoid any misalignment during the installation process.
Step 4: Dig or Core Drill the Hole
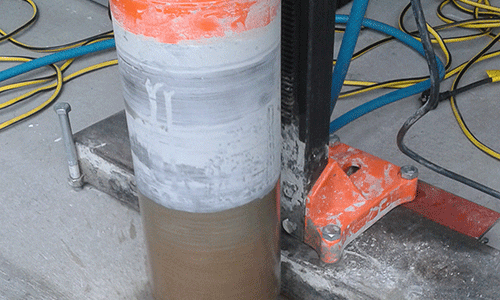
Dig or Core Drill a hole at the marked spot according to the specifications provided in the SHUG bollard kit. The depth and diameter of the hole should accommodate the bollard sleeve and ensure stability.
Step 5: Prepare the Concrete Mix
Prepare the concrete mix according to the manufacturer’s instructions. Ensure the mixture is consistent and ready for immediate use.
Step 6: Install the Bollard Sleeve
Place the bollard sleeve into the hole, ensuring it is centred and upright. Use a spirit level to check the alignment. Pour the prepared concrete mix around the sleeve, filling the hole completely. Allow the concrete to set according to the manufacturer’s curing time, typically 24-48 hours.
Step 7: Insert the Bollard
Once the concrete has set, insert the SHUG removable bollard into the sleeve. Secure it using the provided locking mechanism, ensuring the bollard is firmly in place and functional.
Maintenance Tips
Regular Inspections
Conduct regular inspections to ensure the bollard and sleeve are in good condition. Check for any signs of wear and tear, and address any issues promptly to maintain optimal security.
Cleaning
Keep the bollard and sleeve clean by removing dirt and debris. Use a mild detergent and water for cleaning, and avoid harsh chemicals that could damage the materials.
Lubrication
Periodically lubricate the locking mechanism to ensure smooth operation. Use a suitable lubricant recommended by the manufacturer to prevent rust and corrosion.
Conclusion
Installing a SHUG removable bollard is a practical and effective way to enhance the security and flexibility of your Australian property. By following this step-by-step guide, you can ensure a successful installation that provides robust protection and convenient access control. Whether for residential or commercial use, SHUG bollards offer a reliable solution to safeguard your premises.


